
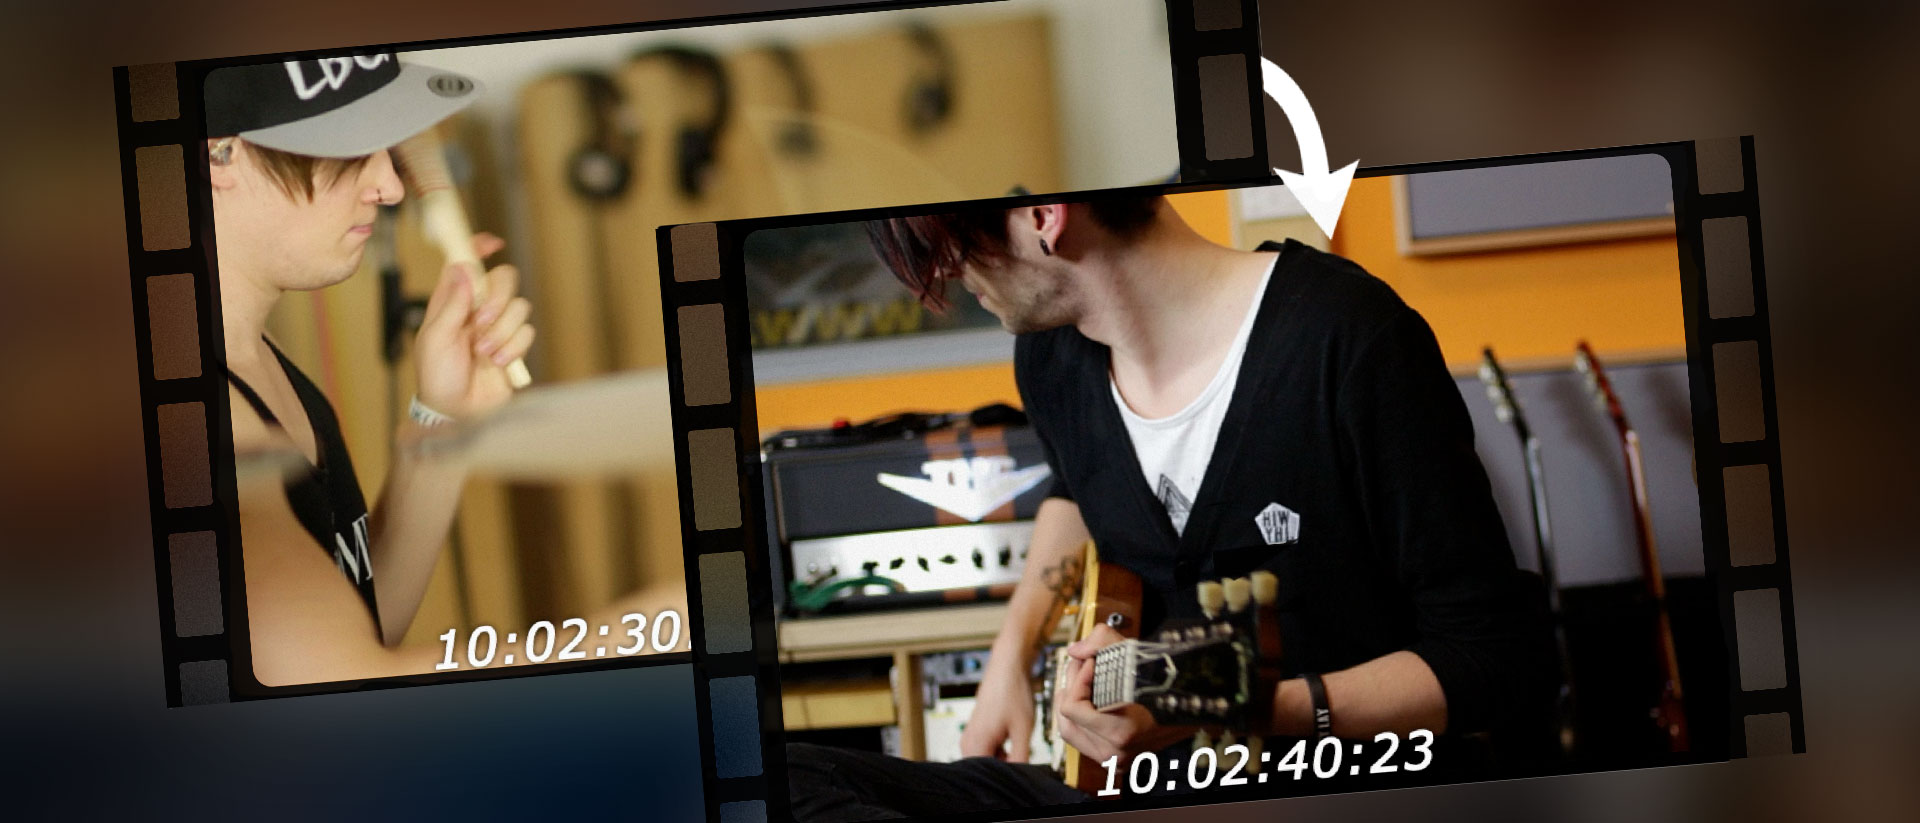
Music videos help you reach a wider audience on platforms like YouTube or Instagram and are a great way to present yourself or your band to the public. In this article you’ll find out what you need to know to create your own music video with simple means. We’ll go through the three stages of video production one by one: preparation, shooting and post-production.
Preparation
Target Platforms
For YouTube you need a landscape video, usually in a 16:9 aspect ratio, although other formats are possible too. Social networks such as Instagram or TikTok, as well as YouTube Shorts, need vertical content in a 9:16 format. And there are a few more important differences:
| YouTube | Social media & YouTube Shorts | |
|---|---|---|
| Format | Usually landscape (16:9) | Portrait (9:16) |
| Resolution | Full HD or 4K | 1080 px wide, 1920 px high |
| Length | Full music video | Excerpts (e.g. the chorus) – 30 to 60 s (recommended) |
| Uploads | One upload per song | Several versions/uploads per song |
| Quality | Fully produced video | Few cuts, authentic content |
It’s perfectly possible to produce content for both YouTube and social media in a single shoot. Ideally, you plan for individual scenes to be filmed vertically as well and position the camera accordingly. Alternatively, you can crop your landscape scenes for social networks – but this may come at the cost of some quality.
Concept
A well-developed concept helps you keep a clear goal in mind during the shoot.
After an initial brainstorm, it’s best to look for references, gather ideas and develop your music video concept from them. To start with, the easiest approach is to show the musicians involved performing the song – in the rehearsal room, at an interesting location or on a stage, for example. These shots alone can already make for a well-rounded, complete music video – and they’re also a good basis for a more elaborate video in which you add further scenes that tell a story. Of course, an elaborate story and lots of people/actors involved also increase the complexity of the shoot, so for your first project it’s best to concentrate on pure performance scenes.
Here’s an example from Joe Bonamassa of an authentic music video in a studio environment:
Equipment: Camera, Lighting and Stabilisation
When it comes to choosing the right camera, you have several options. A state-of-the-art smartphone is always a good choice, of course – although it’s also a deceptive recommendation, since a smartphone with a good camera can cost between €500 and €1,000. If you don’t have a suitable smartphone available, you can buy video gear for under €1,000, or rent it for a shoot at a much lower price.
Here are a few recommendations:
- iPhone (iPhone 15 Pro and newer)
- DJI Osmo Pocket
- Blackmagic Pocket
- Mirrorless cameras (such as Sony Alpha series, Canon R series, Panasonic Lumix)
Note that with cinema and mirrorless cameras you’ll also need additional lenses, which can quickly push up the cost considerably.
Take a look at the following scenes and compare the different cameras with each other – you’ll see that all the systems shown are suitable for shooting music videos, but each has its own qualities:
At least as important as the camera is the lighting. Even simple LED panels enormously improve how professional the result looks. To begin with, so-called soft lights will take you a long way. They provide even illumination and soft shadows. With spotlights on the other hand you can set more artistic accents.
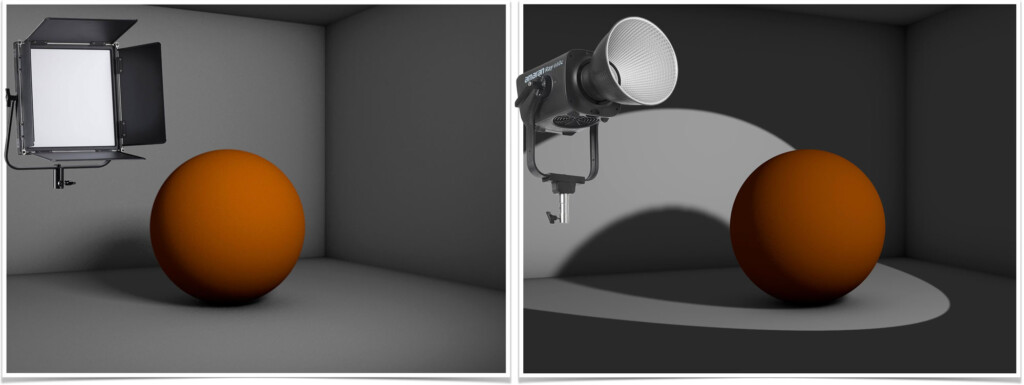
Soft light (left) vs. spotlight (right) – note the shadow behind the ball.
A tripod or gimbal for your camera provides the necessary stabilisation. Tripods are cheap and easy to handle, but only allow static shots, tilts or pans. Gimbals, on the other hand, deliver smooth movement and give you more flexibility.
Also take enough accessories such as memory cards and spare batteries with you to the shoot. There’s nothing more annoying than having to stop a shoot because a card is full or faulty, or a battery is empty.
For a more sophisticated look you can also work with a fog machine, for example, or use so-called “practical lights” such as light tubes or other lamps on your set.
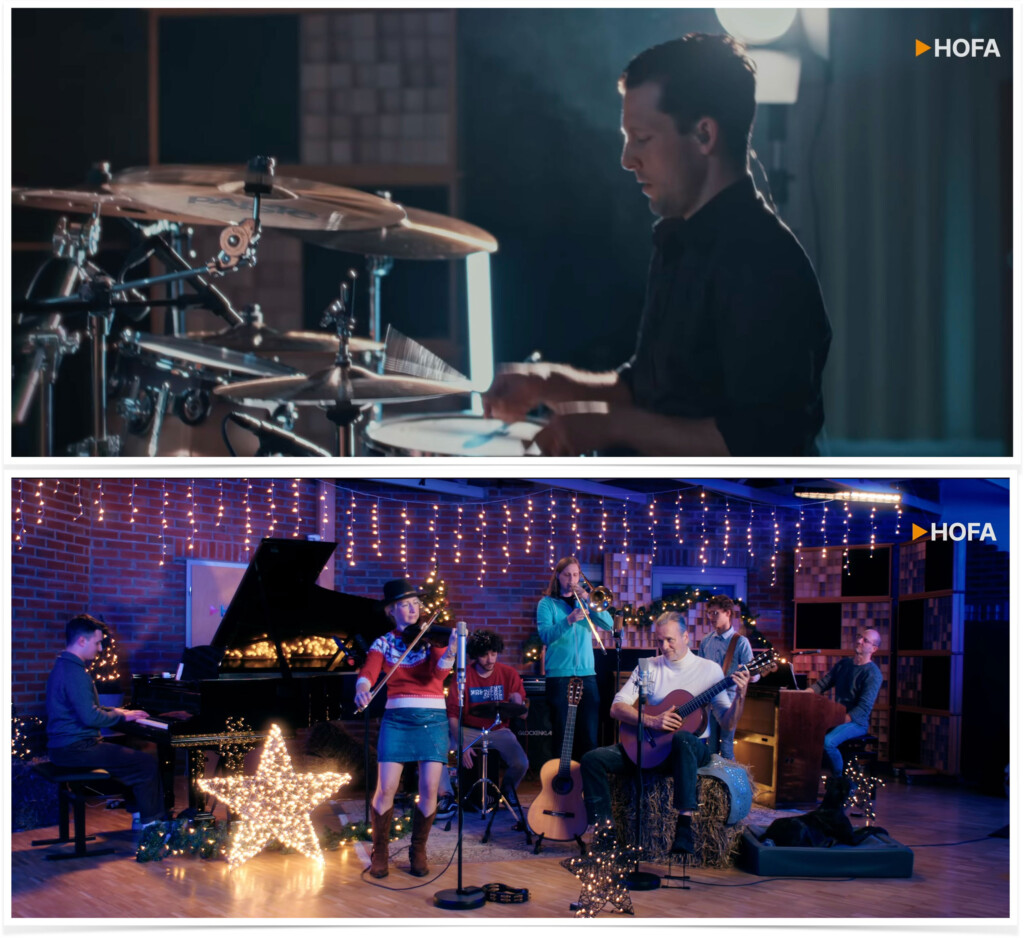
Practical lights in use on our film sets. Top image: subtly, with a lamp in the background (and fog); below: more prominently.
Buy or rent equipment?
Whether it’s better to buy or rent equipment depends on how often you use it. As a rough guide, you can expect a rental provider to charge around 2 to 4% of the purchase price per day. So buying equipment (new) would only pay off after about 10 to 15 shoots of 3 shooting days each – if you buy used, the maths looks different, of course. In practice, both options are often combined. So if you already own a basic setup, you can rent the equipment you specifically need for a particular shoot like a second camera, additional lights and so on.
To get started, and to test equipment before buying, renting a complete kit can also make sense. From around €100 to €150 per shooting day you’ll get a very high-quality setup consisting of camera, lens, tripod, gimbal and lighting.
Once the concept and the equipment are in place, the actual shoot can begin! We’ll continue with that in the next section.
Do you want to learn more about music video production?
Then our online course Music Video Production is exactly right for you! Watch the info video now:
The Shoot
How a shoot works
In most music videos, the performers don’t sing or play live but perform to the finished recording of the song – in other words, playback. The big advantage: on set you can concentrate entirely on the visual performance, build the video set without having to consider sound quality or “audio-engineering realism”, and produce the music video in several attempts in sync with the playback until you have the best take in the can.
The basic process is: the song is played back loudly, the musicians perform in sync with it, and you record picture and sound with one or more cameras. You won’t use that sound in the finished video, of course, but you need it to sync the footage to the playback.
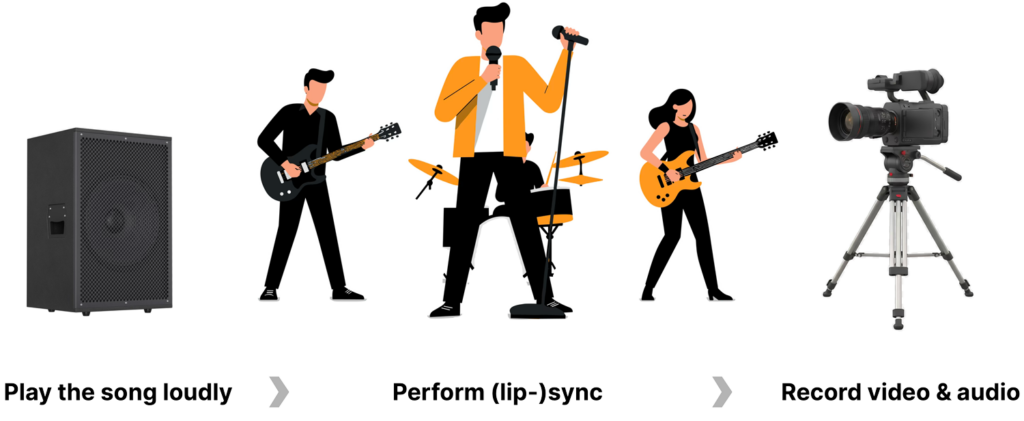
When shooting, always start with a shot in which the room and the whole band are visible (the so-called wide shot). Make sure that all the musicians involved are well framed here. Film this run-through from a tripod, don’t move the camera, and do at least two complete run-throughs of the song. This is your safety shot, which you can always fall back on in the edit, so you should have every second of the music video recorded this way.
After that, you can do further complete run-throughs of the song with different camera positions and framings.
Also make sure you frame the right instruments well at the important moments in the song, and film those scenes separately again if necessary so you have them on camera in the best possible way. Important moments are:
- Vocal entries
- Solos
- Drum breaks
- Instrument entries
- Striking or demanding passages
- Intro & outro
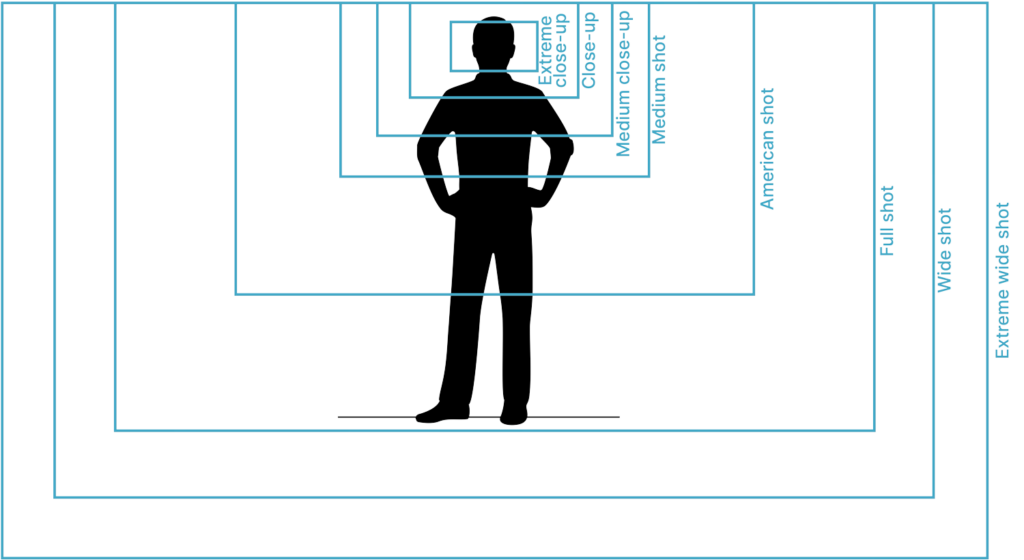
Varying the so-called shot sizes keeps the video exciting and makes editing easier. The most important shot sizes are:
- Wide shot: shows the whole location and the band in context and gives the viewer a sense of the space and the people
- Medium shot: focuses on part of the band as a group, ideal for performance scenes and interaction
- Close-ups and detail shots: faces, playing technique and emotions
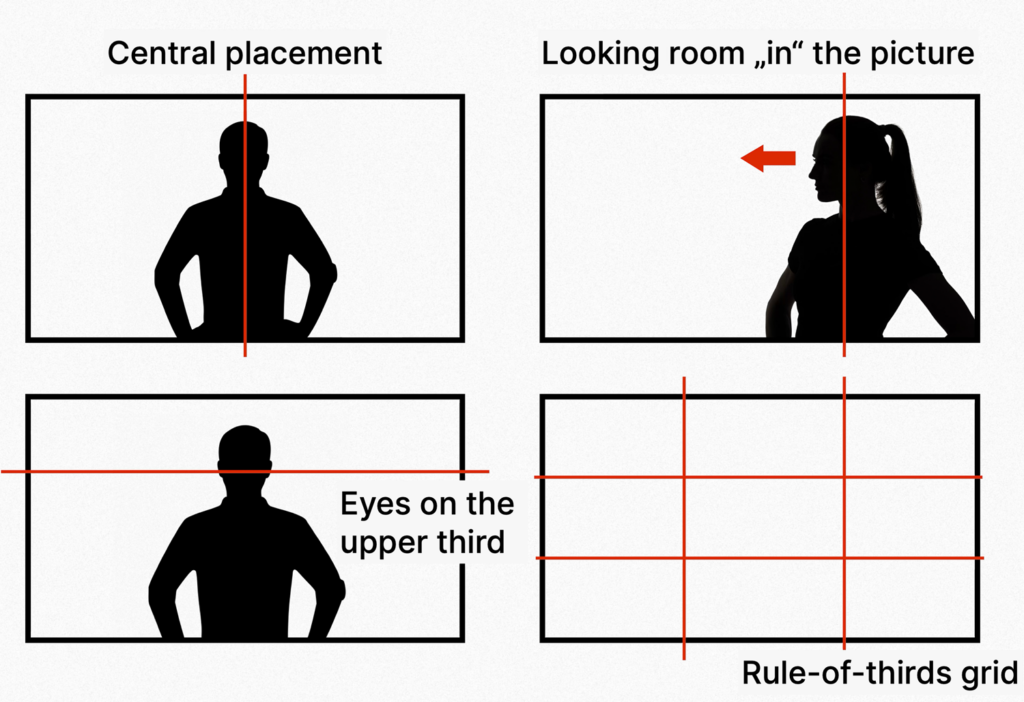
Professional shots are also characterised by good subject placement. Many cameras have a so-called rule-of-thirds grid with guide lines that you can activate for this. Place people centrally or, depending on the direction they’re looking, on one of the two vertical lines. Eyes should generally sit on or near the first horizontal line from the top. As you gain experience, you can of course also deviate from these rules creatively.
Now you’ll hopefully have all your shots in the can and can start turning your footage into the finished video – on to post-production!
Post-Production
Software
There are many professional editing programs on the market. Apple users like to reach for Final Cut Pro, and Adobe Premiere Pro is very widespread too. Currently, however, the only one offering a suitable and comprehensive free version is DaVinci Resolve, by now one of the most popular editing programs. All three programs are of course suitable for cutting and editing music videos.
Syncing
Before editing, first review your footage and select the takes that worked. You then sync these to the audio file of your song in your video timeline. Editing programs often offer automatic solutions for this, which analyse the recorded playback (i.e. the camera sound) and the actual audio file and line them up.
If that doesn’t work, you can also do this step manually, placing the two waveforms on top of each other and syncing them by the look of the waveform. Prominent moments such as loud entries or drum hits work well for this. Pay close attention to flawless syncing and maintain it throughout the entire edit, as a video in sync is essential for a professional music video.
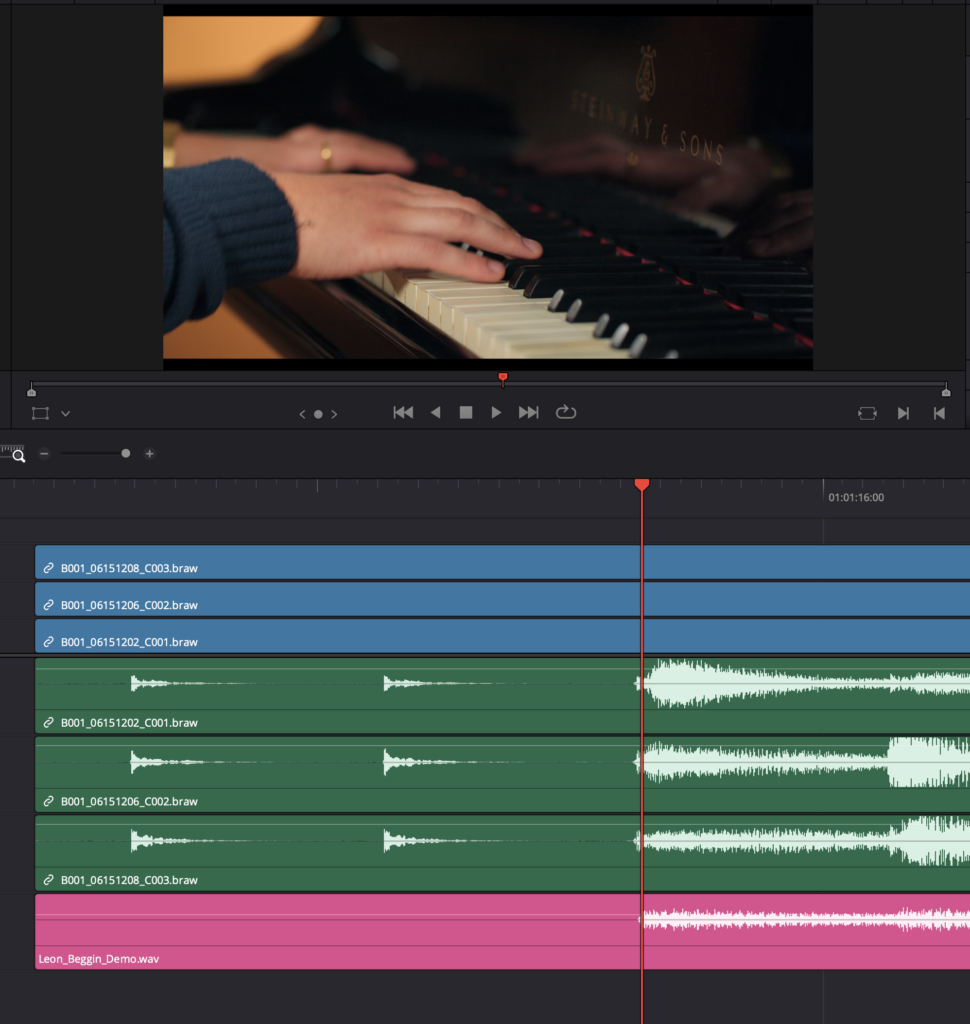
Synced tracks in Resolve (blue: video tracks, green: sound from the set, purple: audio master)
Editing
Unlike in conventional films, the timing of the edit isn’t guided by dialogue or plot but by the rhythm of the song itself. Cuts that land exactly on beats, snare hits or striking musical accents create a viewing experience that is perceived as “right”. In quieter passages of the song, shots can be left to run longer, while energetic choruses benefit from faster cutting. This deliberate play with tempo and timing results in a video that really feels connected to the music. When editing, also alternate between different shot sizes such as wide, close and detail, as well as different perspectives.
Have a look at the different shot sizes and the variety in the edit in this video:
If you use effects such as fades, eye-catching transitions or colour and animation effects, avoid using several elaborate effects at the same time or running them right through the entire video. Less is often more here. Instead, concentrate first on an edit that is in sync, musical and varied.
Once the video is completely finished and you’re happy with the edit, the sync, the colour grading and the effects, you can export it for the target platform. At this point you should allow a little extra time to send the video to bandmates, friends and family – sleep on the result and gather some feedback. Often you’ll have a few more ideas the next day that will improve the video even further.
Learn more about music video production
Now you know how a music video production works and have hopefully picked up plenty of tips and ideas to get your first own video projects started.
By the way, HOFA-College also offers a complete online course on music video production.
In it you’ll learn all the important basics of music video production – from choosing the equipment and designing a music video to the shoot and the finished edit. At the end of the course you can submit your own music video to us for analysis or edit footage we have shot.
This course is also fully included in the ultimate audio engineering online course HOFA AUDIO DIPLOMA.


